Learn to Connect the Roku to WiFi Using go.roku.com/wireless
Roku is one of the ultimate streaming devices available in the market sharing the desirable user experience with the customers. To use the amazing features of the Roku, you first have to set up your device. If you are looking forward to setting up the Roku device at your home or office then you do not need to search further. By accessing the go.roku.com/wireless web address, you can set up the Roku device over the wireless network. It supports the wired and wireless connection so that you can use it according to your preference. Before settings up your Roku device, you need to ensure that your internet connection must be stable and strong to stream the online content. Ensure to place the router and the streaming player nearer to each other which helps in avoiding the trouble during streaming the online content. Let’s go ahead and set up the Roku device through go.roku.com/wireless.

Quick Steps to Connect Roku to WiFi Connection
Look at the below steps for completing the initial network setup of your Roku device that connect it to the WiFi connection:
Step 1: The first step is to connect the Roku device to your home wireless network in the same way you connect your computer or smartphone to the internet.
Step 2: After that, turn on your Roku streaming player. Tap on the Settings menu and then select the go.roku.com/wireless mode.
Step 3: Thereafter, you will see the options of all the available wireless networks displayed on the Television.
Step 4: Go to the list by using the Roku remote.
Step 5: Next, you need to select the option according to your preference from the list and then enter the “password” for accessing the internet connection.
Step 6: Sometimes, the Roku streaming device is unable to detect the nearby available wireless network. In that case, you are required to switch off the Roku player and router. Try again to connect again.
Step 7: In the next step, rescan for the available wireless network and then select the appropriate option from the displayed list.
Step 8: Ensure that your device has activated and a stable internet connection for accessing the Roku services.
Step 9: If your internet connection gets disconnected during making the payment or receiving the activation code then restart and try to connect again.
Step 10: Follow on-screen instructions and then complete the Roku setup process.
Instructions for the Roku Wireless Setup Without Remote Using Mobile Hotspot
The process of connecting the Roku to WiFi using the mobile hotspot is simple. You just need to ensure that the Android device has good internet connectivity:
Step 1: Firstly, unlock the Android device and then access the settings.
Step 2: After that, select the “mobile hotspot” option and then click on “Setup Mobile Hotspot”.
Step 3: Tap on the Ok button when you see the warning on your device about the Mobile data usage displayed on the screen.
Step 4: Next, you are required to add “WiFi Network Name” and choose the “Security Mode as WPA2 PSK”.
Step 5: Now, save the hotspot and then activate it in the final step.
Step 6: In the next step, you are required to download the Roku application on your smartphone from the application store.
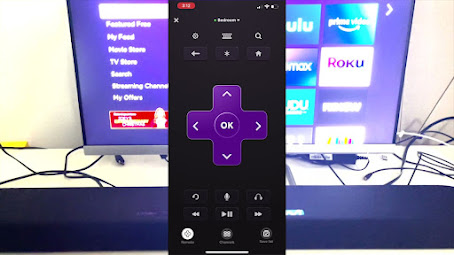
Step 7: Launch the application after installing it on your device.
Step 8: Remote will display on the device the same as the Hardware remote.
Step 9: Connect to the WiFi by using the keys.
Step 10: Go to the settings menu and then search for the WiFi to connect.
Step 11: At last, enter the password and then your device will connect to the network.
These are some simple instructions for the Roku wireless setup by using the go.roku.com/wireless web address. Once your Roku is connected to WiFi, you can stream online content whatever you want to view.

Comments
Post a Comment